


How to Tap a Maple Tree
Have you ever wondered if you could make maple syrup yourself? With the right tools and a few simple steps, you can tap your own maple trees and get the sap flowing! Here is a how to guide to get you started:
Step 1: Gather your supplies
Step 2: Find a tree
Sugar maples will be your best tree for maple syrup. Of course, you will need some basic tree identification skills to determine which tree is a sugar maple. Mature sugar maples are known to have dark brown bark with vertical grooves spaced close together. Be sure you have permission to tap a tree if it's not on your property!
Step 3: Find the right time
Tapping in late winter/early spring will give you the best shot for flowing sap. The sap begins to flow when the days start to get warmer and creep above 0° but the temperatures drop back down below freezing overnight.
The season ends once the buds on the trees begin to open. After this point, the sap coming out of the taps will have a bitter aftertaste.
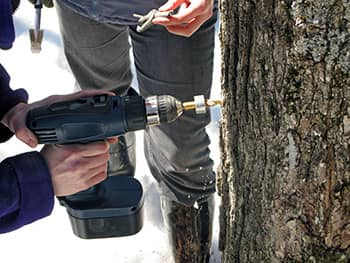
Step 4: It's time to tap
Use your drill to make a hole in the tree somewhere between waist and chest height. Drill your hole on a slightly upward angle. This will allow gravity to help your sap flow. Drill to the depth needed for the size of your spile. Clear the sawdust from the hole and insert the spile. Tap the spile firmly with your hammer to secure it in the tree. Careful not to pound it in too hard - you need to be able to remove your spile at the end of the season!
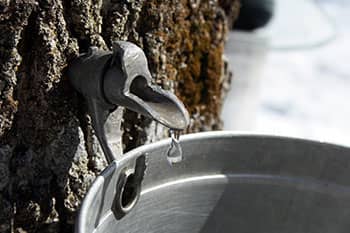
Step 5: Hang Your Bucket
Finally, hang your sap bucket on the hook attached to your spile and place your lid. The tree will do the rest of the work now and the sap should start flowing!