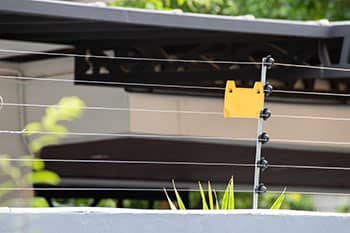
How to Ground Electric Fence
Story by Helen McMenamin
"Poor grounding is the number one reason for electric fencing issues," says Jason Williams, Western Canadian Manager for the Tru-Test Group - which includes Patriot, makers of electric fencing materials. "The ground rods complete the circuit from the animal to the energizer.
"When an animal contacts a live wire, the current flowing through the wire travels through its body to the ground, but that doesn't shock it," he explains. "The current has to flow through the ground to the ground rods and to the energizer to complete the circuit and shock the animal. It takes only 3 milli-seconds, but without good grounding it doesn't happen."
Before you think about a site for your ground system, make sure you're at least 10 meters (33 feet) from house, shop, pump-house or other electrical systems, underground power lines, and phone lines. Siting ground rods too close to phone or electrical systems can cause stray voltage issues.
The ideal spot for a grounding system is in a swampy or shady area, where the soil stays moist. Moisture reduces the resistance of the soil to electricity, but dry, sandy or gravelly soil is not such a good energy conductor. To allow for soils that are poor energy conductors you may be able to move the ground system, make the ground more effective by adding more rods, or use one hot and one ground wire in your fence.
Each rod in a ground system can focus current from about 5 feet away, so at least 10-foot (3-meter) spacing is needed for the full length of each to contribute to the grounding effect. The number of ground rods (or their total length) depends on the output of the energizer. Bigger energizers need more ground rods.
Williams advises using ground rods at least 6 feet long, with 4 inches (10cm) of rod left above the soil surface, for connections. For small projects - powered by energizers with outputs under 0.5 joules - short ground rods about 3-feet long can be used and pushed into the soil, about a foot.
Use insulated cable to connect the ground rods (in series) to the energizer. All the metal and wire in your system should be the same. Don't use both aluminum and copper wire: electrolysis between different metals corrodes one of them entirely. And keep connections above ground, to cut corrosion.
To test your ground system, short-circuit the fence 100 meters or more from the energizer (turned off), with a steel rod. Turn the power back on and measure the fence voltage. It should be under 2kV. If not, add more rods and drive them into the soil about a foot. Once fence voltage reads under 2kV, clip the voltmeter to the last rod of the grounding system and insert the probe into the soil at the full length of the leads. A reading of 0.3 kV or less, means your ground system is adequate. If it's more, you need more ground rods, or a better site.
GROUND SYSTEM CHECKLIST
- All wire connections are securely joined.
- Ground rods are at least 3 meters (10 feet) apart.
- Ground rods connected to each other with the first one connected to the ground post of the energizer.
- The number and length of ground rods is at least as many as recommended in your user manual (or 1 meter of rod per output joule).
- All parts of the system are made of the same metal.
- None of the rods are within 10 meters of electrical wiring or grounding - sometimes grounds are some distance from the building.


